Today the smartphone stores much important information which we will never want to lose at any cost. Taking extra measures to protect your data is a good habit such as making a backup of the phone period. Backing up important data helps us when unexpected things happened like accidental deletion or losing them due to any other reason from your OnePlus 8/8 Pro. Thus, backup plays a very important role in our daily busy life. So, if you want to back up your OnePlus 8/8 Pro data, follow this article and you will get the best and correct methods of how to backup and restore OnePlus 8/8 Pro.
Method 1: Backup and restore OnePlus 8/8 Pro via OnePlus Switch
The OnePlus Switch is the official app from OnePlus company. With OnePlus Switch, you can easily back up your data, including contacts, messages, photos, videos, and more.
Back up OnePlus 8/8 Pro by simply following these steps:
- Step 1: Connect your device to the network and run the OnePlus switch application.
- Step 2: Go to "Backup and Restore". Here are two options – New Backup and Restore Backup.
- Step 3: Tap the "New Backup" option and choose what kinds of data you want to backup. Here are contacts, call logs, messages, notes, pictures, audio, video, applications, and some of the system info like ringtones, etc. ( Note: "Backup and Restore" will not backup any app data .)
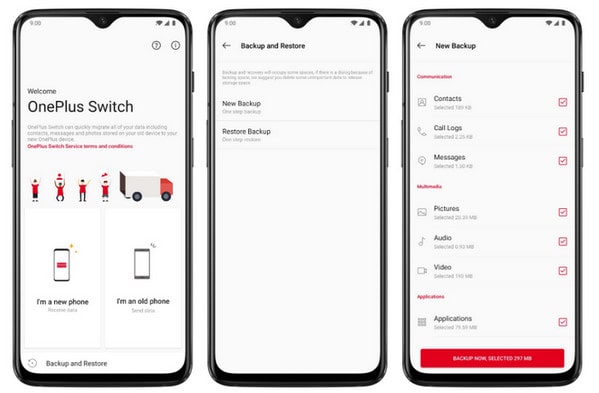
- Step 4: After you have selected the files you want to backup, tap Backup Now.
- Step 5: You can check the progress and confirm the backup completed. Go to File Manager > Storage > [opbackup] > [MobileBackup]. Under the MobileBackup, you can see your backup data.
- Important Note: If you are planning to factory reset your device, please copying the folder "opbackup" to your computer manually and restore it once you are done resetting your device.
Restore OnePlus 8 via OnePlus Switch/Restore the Backup created from OnePlus Switch app:
- Step 1. Launch the Oneplus Switch app on your OnePlus 8/8 Pro
- Step 2. Choose "Backup and Restore >> Restore Backup".
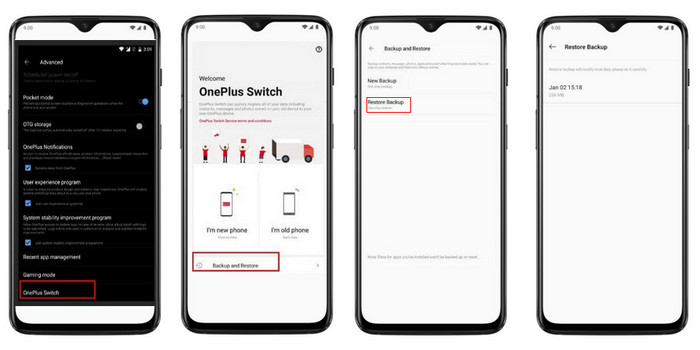
- Step 3. Select what files you want to restore. OnePlus Switch will help you to restore Contacts, Call Logs, Messages, Notes, Pictures, Audio, and Videos.
Summary
1. It will take up a certain space in your device. Sufficient storage space is required if you migrate a large number of files. If you get stuck in this step, you can clear up space or choose to backup part of the data.
2. If you will do a factory reset, please move the "opbackup" folder over to your PC as it will get removed during a factory reset.
As the restore function is not stated detailed and clearly on the OnePlus website, we think the main focus of OnePlus Switch is to transfer data from the old phone to the new oneplus8/8 Pro.
Method 2: Backup and restore via Google Drive (message backup might missing)
Google Drive is another popular way to backup and restore your OnePlus 8 data. Google Drive mainly serves as a cloud place to save your old data. You can backup your OnePlus phone data to it and copy all the data from Google Drive to your phone.
Steps of backing up OnePlus 8 to Google Drive
- Step 1. Please go "settings- Google - Backup" to enable "Back up to Google Drive". If you have not found it, just install the Google Drive app on your phone.
- Step 2. Login in your Google account in OnePlus 8/8 Pro. Now select the photos, videos, and document files that you want to backup.
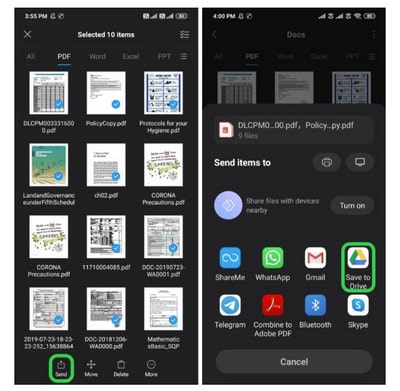
- Step 3. And finally allow uploading your data to Google Drive.
How to restore from Google Drive?
- Step 1: Open Google Drive application on your OnePlus 8/8 Pro phone. Log in your Google account. Please use the same Gmail ID and password that you have used at the backup time.
- Step 2: Once you logged-in to Google drive, you can see the uploaded photos, videos, and document files.
- Step 3: Now you can select the files that you want to restore and easily download the files from there.
Summary
1. Only 15GB of free storage.
2. Google ONE does not backup messaging if you do not use the Google messaging, messages app.
Method 3: Backup OnePlus 8/8 Pro data to the computer and restore them all via an OnePlus backup tool.
If you do not want to back up all your data on OnePlus 8/8 Pro to a safe place instead of the storage of phone or cloud space, we suggest using the third-party tool to realize it. PanFone OnePlus Data Transfer is one of them. It supports backing up all the contents include contacts, messages, call logs, music, photos, videos, apps, bookmarks, and more to your computer by one-click.
Here is how to back up OnePlus 8/8 Pro to the computer:
Step 1: Click the following button to download and install PanFone OnePlus Data Transfer on your PC or Mac. The PC system will automatically create a shortcut to the Program on your desktop.
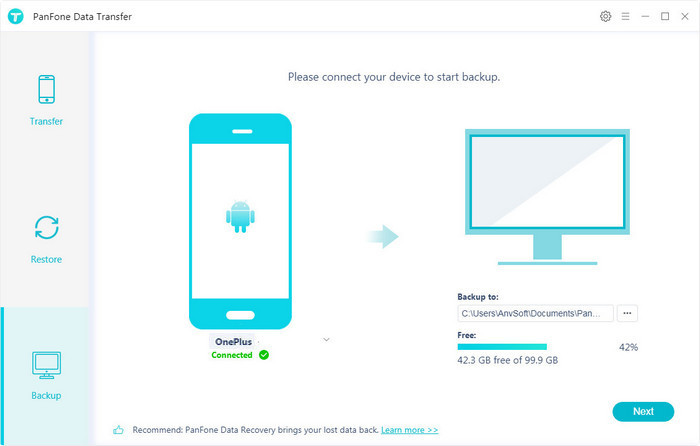
Step 2: Run PanFone OnePlus Data Transfer and there are options on the main interface: Transfer, Restore, Backup. Please choose the "Backup" option.
Step 3: Connect your OnePlus8/8 Pro to PC with the appropriate cable, enable USB debugging mode on your phone.
Step 4: Under the "Backup", you can customize the path you want to store the backup on your PC. The PanFone also shows you the total size of the storage you can backup. And then click on the Next button.
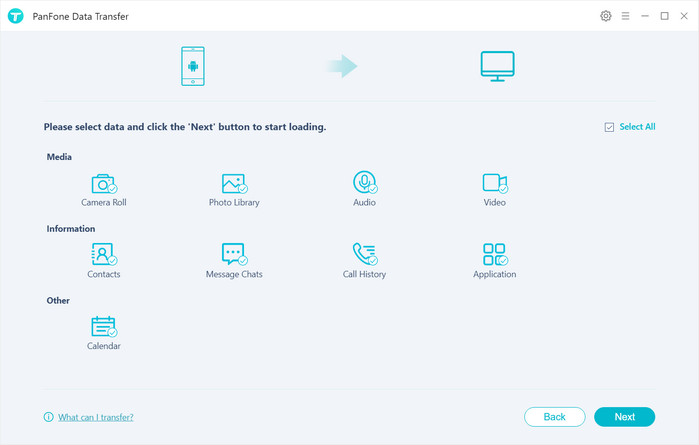
Step 5: Here are all the files you can back up. Pick "Select All" or just choose the file you want to backup. Get everything settled, and you can start the backup. Then click the "Next" button to start.
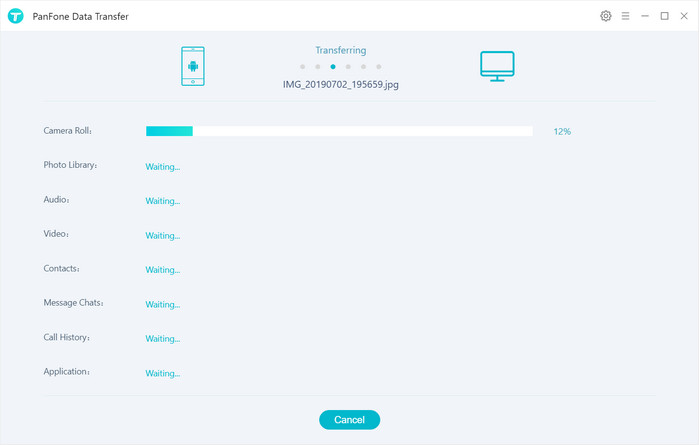
Once the backup finished, PanFone OnePlus Data Transfer would save your backup to the path you referred to.
Restore by one-click:
It is quite easy. Once you have backed up your device to PC, you can restore the data to your OnePlus 8/8 Pro at ease. Note: please do not change the name and path of the backup folder on PC.
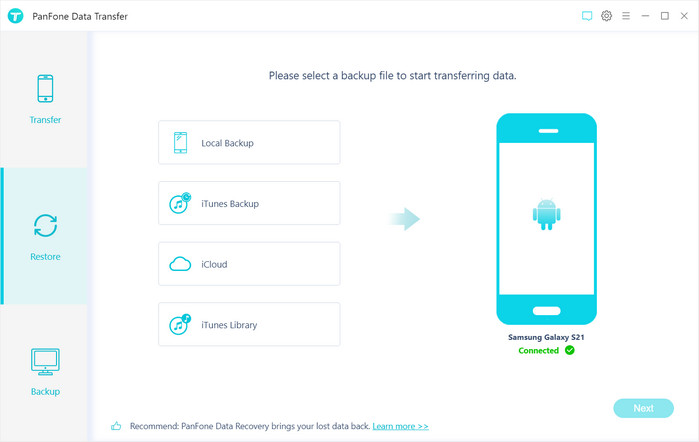
Step 1: Run PanFone OnePlus Data Transfer and navigate to the Restore module. Connect your OnePlus to the computer. When the phone is connected successfully, choose "Local Backup".
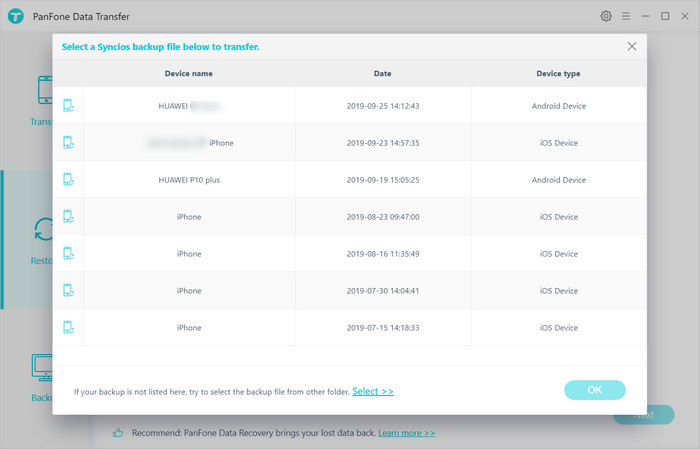
Step 2: PanFone Data Transfer will display all backups you made previously. From there, you can select the backup file that you want and hit on "OK" to continue, then hit "Next" and select data to restore.
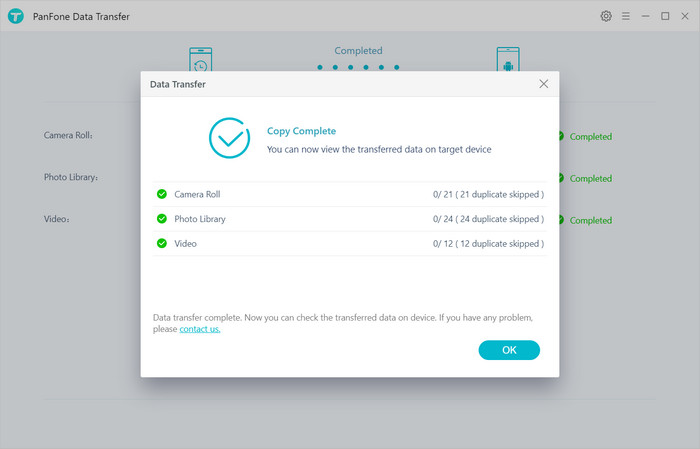
Step 3: After a while, PanFone will restore all of the backed up data from the computer to your OnePlus 8/8 Pro.
Summary
1. Back up all data to your computer without space limitation.
2. Restoring data completely including messages, contacts, call logs, music, photos, videos, bookmark, and more.
Final Words:
Every user keeps lots of valuable data like pictures, videos, contents, text messages apps, etc. on their smartphone. And they wish to back up these important data safely in their phone or in another place. So, above you have learned the top 3 methods to backup and restore your OnePlus 8/8 Pro data. You can follow any of the above-mentioned methods as per your requirement. And all the above three ways also support transferring data from another phone device to OnePlus 8 or OnePlus 8 Pro.
As for a recommendation, we suggest you to try Method 3 that is discussed about Android Data Backup & Restore Software because this tool will help you to backup and restore data in a quick, efficient, easy and convenient way. And PanFone OnePlus Data Transfer also supports transferring data from iOS device and iTunes/iCloud backup. It makes users freely switch between Android and iOS devices. No limitation of phone numbers.
Features of PanFone Mobile Data Transfer
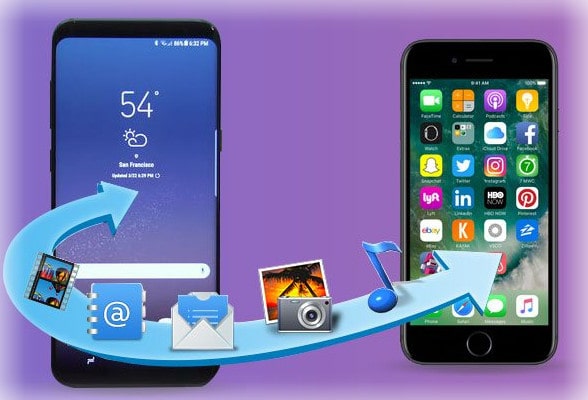
PanFone Mobile Data Transfer is a one-click solution for you to sync data between iOS & Android, restore iTunes and iCloud data to device conveniently, as well as back up your phone data and restore later.
- Transfer files between Android and iOS, including contacts, photos, music, SMS, and more.
- Backup phone data and restore in lossless quality.
- Recover iTunes/iCloud backup to iOS or Android devices.
- Sync media files from iTunes Library to devices.
- Compatible with Android 10 and the latest iOS.


Comments
Post a Comment